Pan, Oil, AWD: Removal
- Disconnect the negative battery cable.
- Remove the Variable Valve Timing Solenoid (VVTS). Refer to SOLENOID, VARIABLE VALVE TIMING (VVTS), EXHAUST, REMOVAL
.CAUTION:
Never use air tools when installing fasteners to engine.
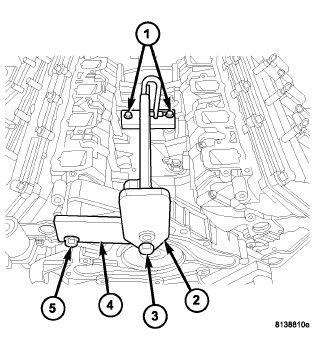
- Install the engine lift fixture (2) special tool (special tool #8984B, Fixture, Engine Lifting) and adapter (special tool #8984-UPD, Adapter, Engine Lift).
- Remove the belly pan. Refer to BELLY PAN, REMOVAL .
- Drain the engine oil and remove the oil filter.
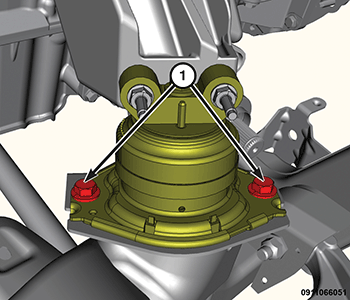
- Remove both left and right side engine mount isolator to engine cradle retaining bolts (1).NOTE:
Do not remove the power steering hoses, tie rod ends or disconnect steering column.
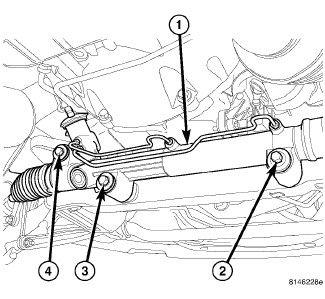
- Remove the steering rack mounting bolts (2, 3, 4) and lower the steering rack (1).
- Remove the engine oil dipstick and tube from the oil pan.
- Remove the left and right side exhaust pipes at the exhaust manifolds. Refer to CONVERTER, CATALYTIC, REMOVAL 5.7L
.
- Mark the front drive shaft to the flange at both ends to ensure correct installation.
- Remove the front drive shaft fasteners from the differential and transfer case and remove the drive shaft from the vehicle.
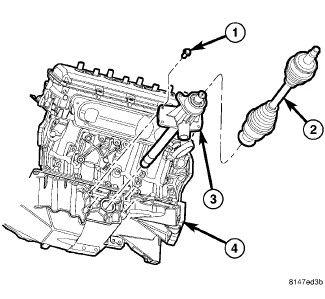
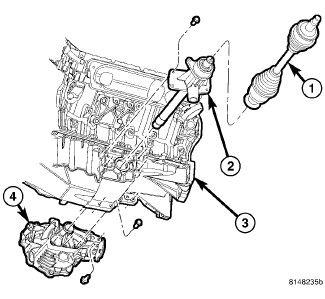
- Remove the left (2) and right front drive axles.
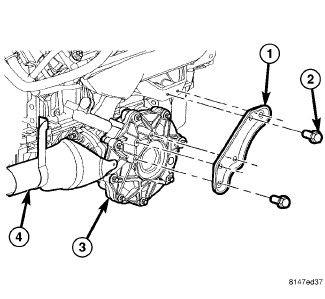
- Remove the differential support bracket (1) from the differential to engine block.
- Remove the differential retaining bolts from the oil pan (3).
- Rotate the differential (4) so the drive flange is facing forward and the oil pan side is facing up and remove the differential out through the opening at the rear of the cradle.
- Remove the intermediate shaft (2) from the oil pan (3).
- Lower the vehicle.NOTE:
Do not attempt to fasten the engine support fixture to vehicle body, or attach the third support leg to the radiator support.
- Raise the engine using the engine support fixture (special tool #8534C, Fixture, Driveline Support) and adapter (special tool #8984-UPD, Adapter, Engine Lift) to gain clearance to remove oil pan.
- Raise and support the vehicle.
NOTE:
Do not pry on oil pan or oil pan gasket. Gasket is integral to the engine windage tray and does not come out with oil pan.
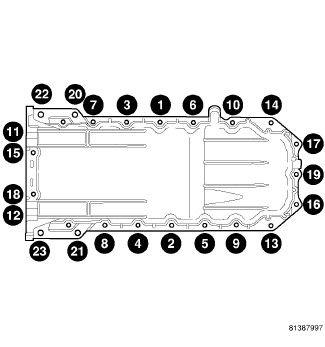
NOTE:The horizontal M10 fasteners are 5 mm longer in length, and must be reinstalled in the original locations.
- Using the sequence shown, remove the M10 fasteners (vertical and horizontal) from the rear of the oil pan to the transmission and engine.
- Using the sequence shown, remove the oil pan mounting bolts and oil pan.NOTE:
When the oil pan is removed, a new oil pan gasket/windage tray assembly must be installed. The old gasket cannot be reused.
- Discard the integral windage tray and gasket.