Manifold, Exhaust: Removal
- Disconnect and isolate the negative battery cable.
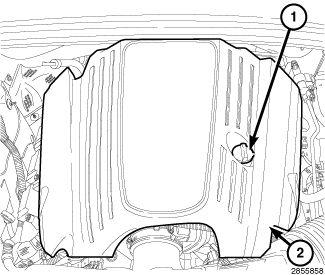
- Remove the engine cover (2).
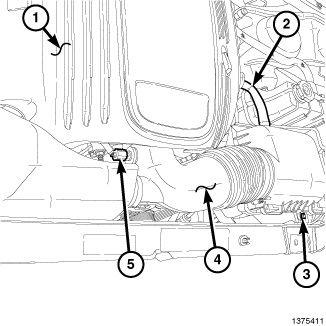
- Disconnect the intake air temperature (IAT) sensor (5) wire harness connector.
- Loosen the clamps at the throttle body and the air filter housing and remove the air tube (4).
- Disconnect the make up air hose (MUA) (2).
- Remove the air filter housing retaining bolt (3).
- Remove the air filter housing.
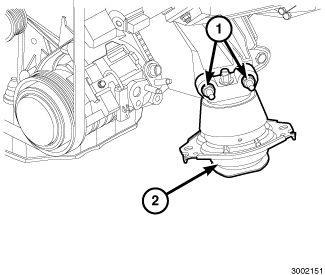
- Remove both front engine mounts (2) and mounting brackets. Refer to INSULATOR, ENGINE MOUNT, FRONT, REMOVAL, 5.7L .CAUTION:
When separating the catalytic converters from the manifolds, disconnect the oxygen sensor connectors. Allowing the catalytic converters to hang from the oxygen sensor wires damages the harness or sensors.
- Raise and support the vehicle. Refer to HOISTING, STANDARD PROCEDURE .
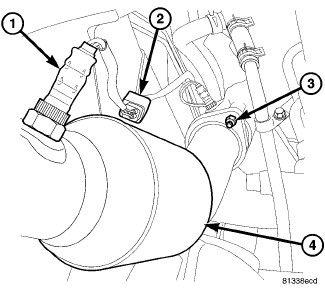
- Disconnect the oxygen sensor wire harness connectors (2).
- Saturate the front exhaust pipe/catalytic converter retaining bolts and nuts with Mopar® Rust Penetrant or equivalent and allow 5 minutes for penetration.
- Remove both catalytic converters (4). Refer to CONVERTER, CATALYTIC, REMOVAL 5.7L
.NOTE:
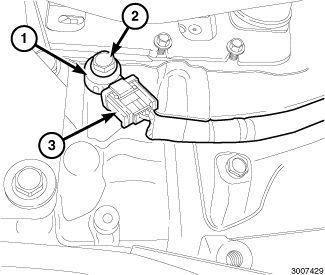
Two knock sensors (1) are used, they are bolted to each side of the cylinder block under each exhaust manifold (3).
- Remove the heat shields from the appropriate knock sensor (shield snaps onto sensor).
- Disconnect the appropriate knock sensor wire harness connector (3).
- Remove the appropriate knock sensor retaining bolt (2) and remove knock sensor (1).
- Lower the vehicle.
LEFT SIDE:
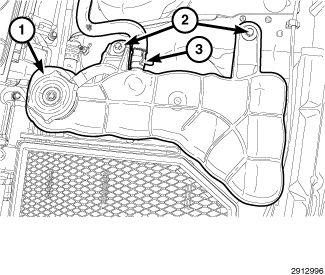
NOTE:It is not necessary to remove the hoses from the coolant bottle for coolant bottle removal.
- Remove coolant bottle retaining bolts (2) and position aside.
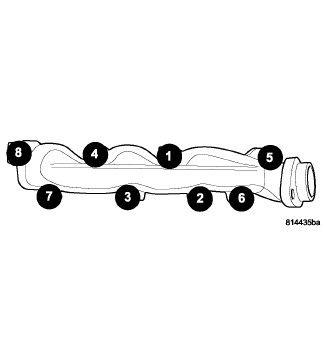
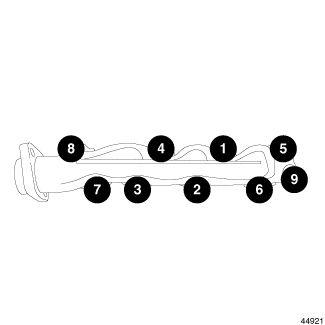
- Using the sequence shown, remove the exhaust manifold retaining bolts.
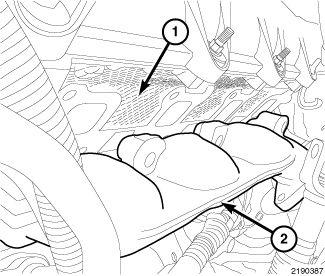
- Remove the exhaust manifold (2) and gasket.
- Inspect the exhaust manifold for any damage. Refer to INSPECTION .
- Clean the exhaust manifold mating surfaces (1, 2).
RIGHT SIDE:
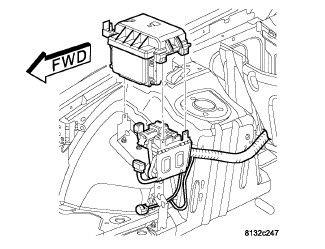
- Remove the Power Distribution Center (PDC) and mounting bracket.
- Unfasten the wire harness mounted on the right hand inner fender panel and position aside.
- Remove the exhaust manifold heat shields.
- Using the sequence shown, remove the exhaust manifold retaining bolts.
- Remove the exhaust manifold (2) and gasket.
- Inspect the exhaust manifold for any damage. Refer to INSPECTION .
- Clean the exhaust manifold mating surfaces.