Half Shaft: Installation
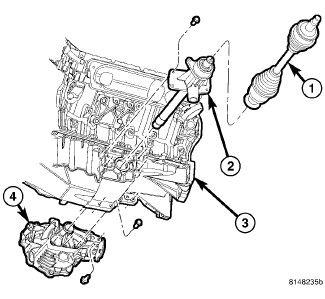
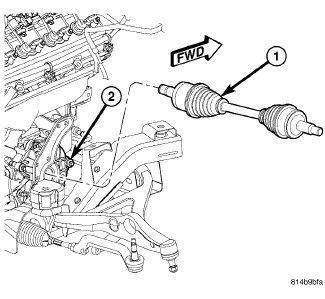
- Install the left half shaft assembly (1).
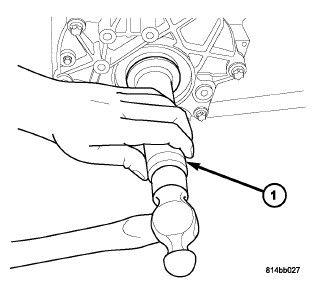
- Using the Seal Installer C-4193A (1), install a NEW
axle seal.
- Install the right half shaft assembly (1).
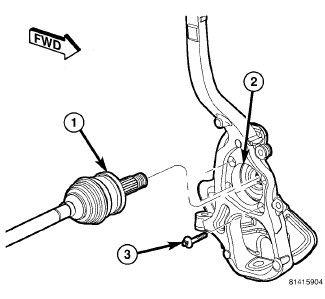
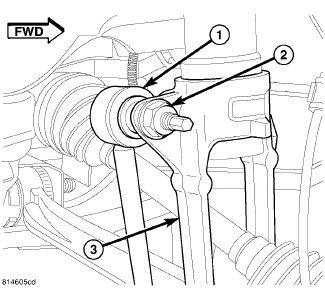
- Install the half shaft (1) into hub/bearing assembly (2).NOTE:
Always install a new hub nut. The original hub nut is one-time use only and should be discarded when removed.
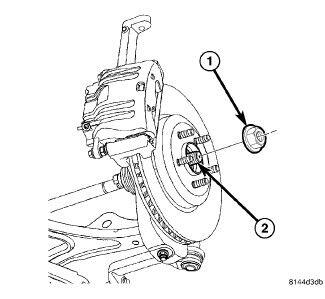
- Loosely install the half shaft hub nut (1), and do not tighten at this time.CAUTION:
It is important to tighten nut as described in following step to avoid damaging ball stud joint.
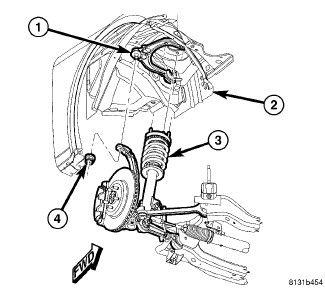
- Place upper ball joint stud (1) through hole in top of knuckle and install nut (4). Tighten nut by holding ball joint stud with a hex wrench while turning nut with a wrench. Tighten nut using crow foot wrench on torque wrench to 47 N.m + 90° turn (35 ft. lbs. + 90° turn) torque.NOTE:
Inspect brake shoes (pads) before installation. Refer to PADS, BRAKE, INSPECTION .
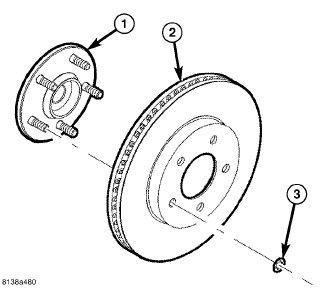
- Clean the hub face (1) to remove any dirt or corrosion where the rotor mounts.
- Install the brake rotor (2) over the studs on the hub and bearing.
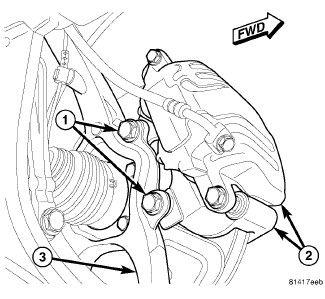
- Install the disc brake caliper and adapter assembly (2) over the brake rotor.
- Install the mounting bolts (1) securing caliper adapter (2) to knuckle (3). Tighten the bolts to the proper torque specifications. Refer to TORQUE SPECIFICATIONS .
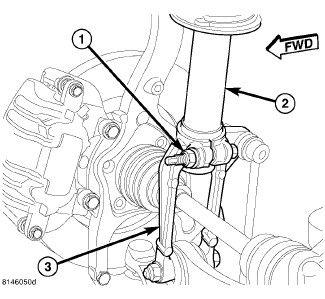
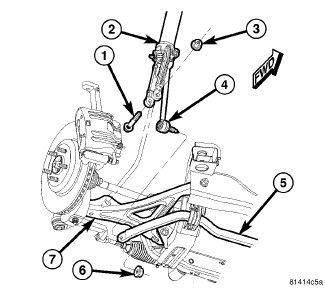
- Pull lower end of shock assembly outward, then slide clevis bracket (3) onto lower end. Slide clevis bracket onto shock assembly until bracket contacts collar on shock housing (2).
- Install pinch bolt and nut (1) fastening clevis bracket (3) to bottom of shock assembly (2). Install pinch bolt from rear. Do not tighten at this time.
- Slide clevis bracket (2) over bushing mounted in lower control arm (7).
- Install bolt (1) and nut (3) attaching shock clevis bracket (2) to lower control arm (7). Do not tighten at this time.
- Tighten pinch bolt (1) attaching clevis bracket to shock assembly and tighten to the proper torque specifications. Refer to FRONT, TECHNICAL SPECIFICATIONS
.
- Slide stabilizer link ball joint stem into clevis bracket. Install nut (2) fastening link to clevis bracket (3). Tighten nut by holding ball joint stud while turning nut. Tighten nut using crow foot wrench on torque wrench to the proper torque specifications. Refer to FRONT, TECHNICAL SPECIFICATIONS
.
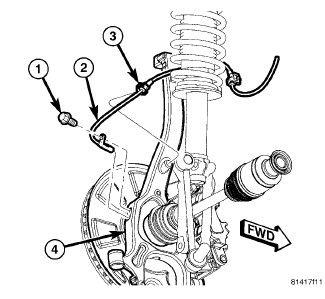
- Attach wheel speed sensor cable routing clip (3) at knuckle (4).
- Install hub nut (1) on end of axle half shaft (2). While an assistant applies the brakes to keep the hub from turning, tighten hub nut to the proper torque specifications. Refer to FRONT, TECHNICAL SPECIFICATIONS .
- Install the tire and wheel assembly. Refer to INSTALLATION .
- Remove the support and lower the vehicle.NOTE:
When tightening lower shock clevis mounting bolt, do not attempt rotating bolt. Bolt shaft is serrated. Turn nut only.
- Tighten lower shock clevis bracket bolt nut (3) to the proper torque specifications. Refer to FRONT, TECHNICAL SPECIFICATIONS .