Cover(S), Cylinder Head: Installation: Right
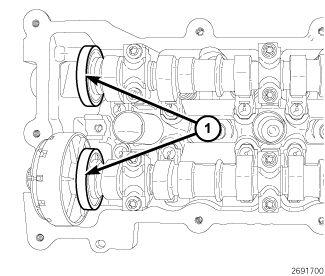
The magnetic timing wheels (1) must not come in contact with magnets (pickup tools, trays, etc.) or any other strong magnetic field. This will destroy the timing wheels ability to correctly relay camshaft position to the camshaft position sensor.
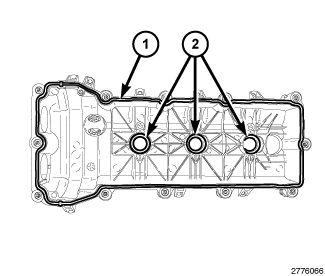
The LH cylinder head cover is shown, the RH cylinder head cover is similar.
- Install the cylinder head cover gasket (1).
- The spark plug tube seals (2) can be reused if not damaged.
- If required, install new spark plug tube seals (2) in the cylinder head cover:
- Lubricate the spark plug tube seal inner and outer diameters with clean engine oil.
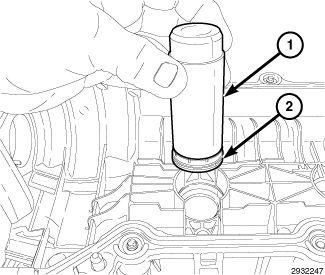
- Place the spark plug tube seal (2) on the Cam Sensor/Spark Plug Tube Seal Installer (special tool #10256, Installer, Cam Installer, Cam Sensor/ Spark Plug Tube Seal) (1).
- Push the seal into the cylinder head cover until the base of the seal is seated.
- Remove the tool.
NOTE:The LH cylinder head cover T-joint is shown, the RH cylinder head cover T-joint is similar.
- Clean the timing engine timing cover, cylinder head and cylinder head cover mating surfaces with isopropyl alcohol in preparation for sealant application.CAUTION:
Engine assembly requires the use of a unique sealant that is compatible with engine oil. Using a sealant other than Mopar® Threebond Engine RTV Sealant may result in engine fluid leakage.
CAUTION:Following the application of Mopar® Threebond Engine RTV Sealant to the gasket surfaces, the components must be assembled within 10 minutes and the attaching fasteners must be tightened to specification within 45 minutes. Prolonged exposure to the air prior to assembly may result in engine fluid leakage.
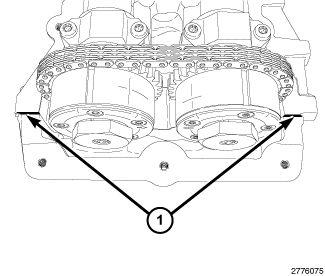
- Apply a 2 to 3 mm wide bead of Mopar® Threebond Engine RTV Sealant (1) to the two engine timing cover to cylinder head T-joints as shown.
- Align the locator pins (1) to the cylinder head and install the cylinder head cover.
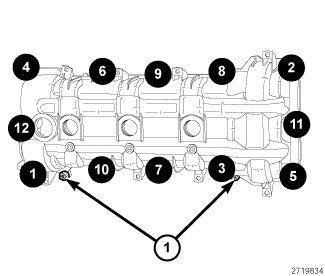
- Tighten the cylinder head cover bolts and double ended studs in the sequence shown to proper specification. Refer to TORQUE SPECIFICATIONS
.NOTE:
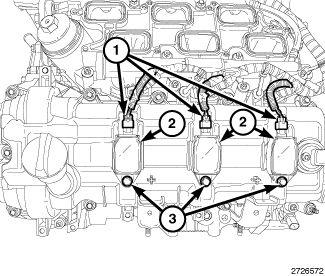
The LH ignition coils are shown, the RH ignition coils are similar.
- If removed, install the spark plugs Refer to SPARK PLUG, INSTALLATION .
- Install the ignition coils (2) Refer to COIL, IGNITION, INSTALLATION
.
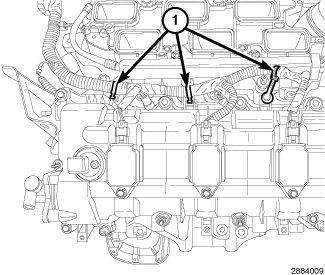
- Engage three injection/ignition harness retainers (1) to the right cylinder head cover.
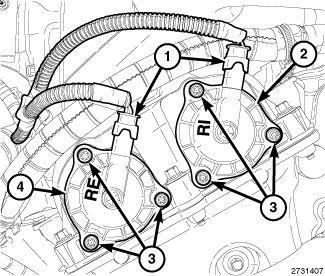
- Refer to the markings made at disassembly and install the variable valve timing solenoids (2 and 4) in their original locations Refer to SOLENOID, VARIABLE VALVE TIMING, INSTALLATION
.
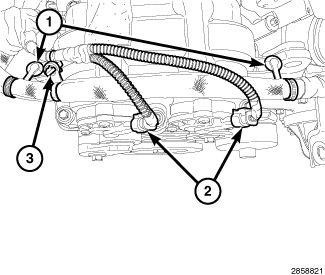
- Connect the electrical connectors (2) to the variable valve timing solenoids on the right cylinder head.
- Engage two starter wire harness retainers to the right cylinder head cover (1).
- Engage the starter harness to main harness retainer (3).
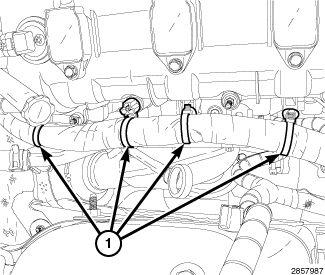
- Engage four main wire harness retainers (1) to the right cylinder head cover.NOTE:
If both RH and LH CMP sensors where removed, install them into their original locations.
- Install the camshaft position sensor Refer to SENSOR, CAMSHAFT POSITION, INSTALLATION
.
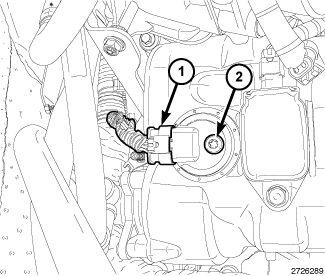
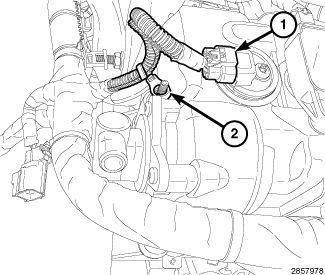
- Connect the electrical connector (1) to the right Camshaft Position (CMP) sensor.
- Engage the main wire harness retainer (2) to the right cylinder head cover mounting stud.
- Install the PCV valve (1). Refer to VALVE, POSITIVE CRANKCASE VENTILATION (PCV), INSTALLATION
.
- Raise and support the vehicle. Refer to HOISTING, STANDARD PROCEDURE .
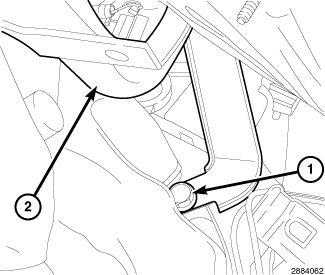
- Install the transmission fluid level indicator tube (2) with the upper transmission to engine bolt (1) tightened to proper specification. Refer to TORQUE SPECIFICATIONS
.
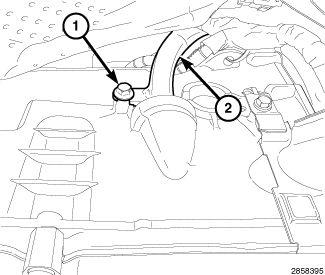
- Install the bolt (1) securing the transmission fluid level indicator tube (2) to the transmission housing and tighten to proper specification. Refer to TORQUE SPECIFICATIONS
.
- Lower the vehicle.
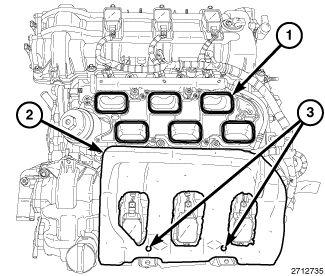
- If removed, install the insulator (2) to the two alignment posts (3) on top of the LH cylinder head cover.
- Install the upper intake manifold, support brackets and air inlet hose. Refer to MANIFOLD, INTAKE, INSTALLATION .
- Connect the negative battery cable.
The Cam/Crank Variation Relearn procedure must be performed using the scan tool anytime there has been a repair/replacement made to a powertrain system, for example: flywheel, valvetrain, camshaft and/or crankshaft sensors or components.