In Vehicle
WARNING: This page is about a different variant/trim than selected.
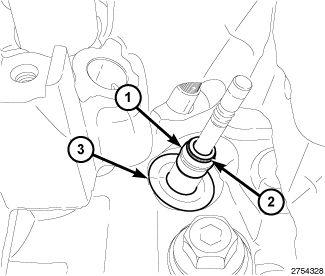
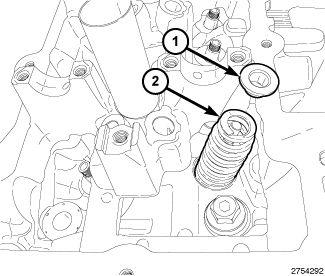
- If removed, install the spring seat (3) and valve guide seal (1) over the valve guide. Refer to SEAL(S), VALVE GUIDE, INSTALLATION .NOTE:
Ensure that the garter spring (2) is intact around the top of the valve guide seal (1). Number 5 cylinder exhaust valve guide seal shown, all other valves similar.
NOTE:If the valve springs are being reused, reassemble them into their original locations. Number 5 cylinder exhaust valve spring shown, all other valves similar.
- Install the valve spring (2) and valve spring retainer (1).NOTE:
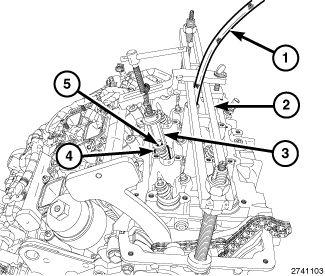
Number 4 cylinder intake valve spring compression shown, all other valves similar.
- Using Valve Spring Compressor Adapter (special tool #10224, Adapter, Valve Spring) (3) with Valve Spring Compressor (special tool #MD998772A, Compressor, Valve Spring) (2), compress the valve spring (4) only enough to install the valve retaining locks (5).
- Relieve the air pressure and remove the spark plug adapter (1).
- Install the spark plugs. Refer to SPARK PLUG, INSTALLATION
.NOTE:
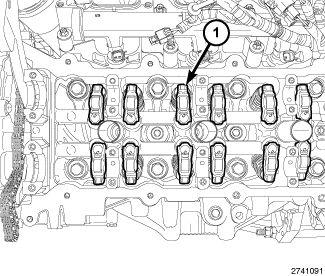
The LH cylinder head rocker arms are shown, the RH cylinder head rocker arms are similar. If the rocker arms are being reused, reassemble them into their original locations.
- Install the rocker arm(s) (1).
- Install the camshaft(s). Refer to CAMSHAFT, ENGINE, INSTALLATION .
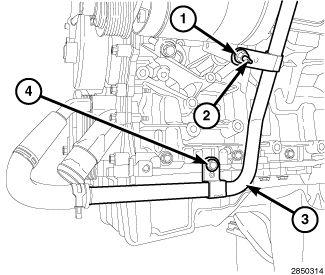
- If removed, install the nut (1) and bolt (4) to the support brackets of the heater core return tube (3). Tighten the fasteners to the proper specification. Refer to TORQUE SPECIFICATIONS .
- If removed, install the A/C suction and liquid line assembly. Refer to LINE, A/C SUCTION, INSTALLATION .
- Connect the negative battery cable.