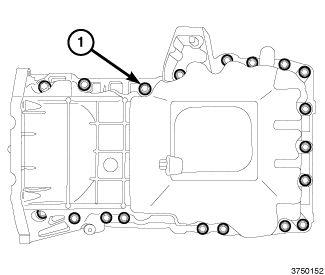
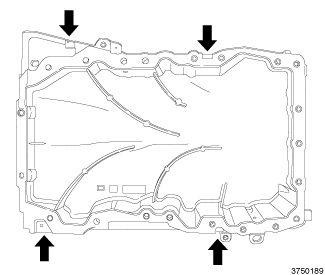
Pan, Oil: Removal: AWD
WARNING: This page is about a different variant/trim than selected.
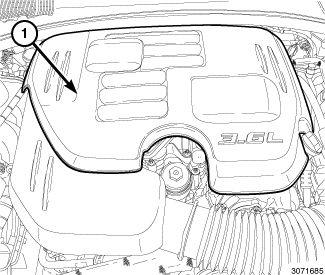
- Disconnect and isolate the negative battery cable.
- Lift the engine cover retaining grommets off the ball studs and remove the engine cover (1).
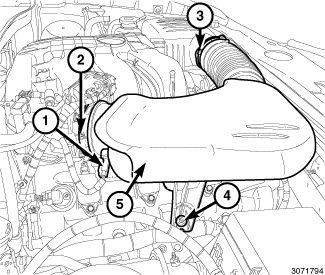
- Disconnect the electrical connector (1) from the Inlet Air Temperature (IAT) sensor.
- Loosen the clamp (2) at the throttle body.
- Loosen the clamp (3) at the air cleaner housing.
- Lift the air inlet hose assembly retaining grommet off the ball stud (4).
- Remove the air inlet hose assembly (5).
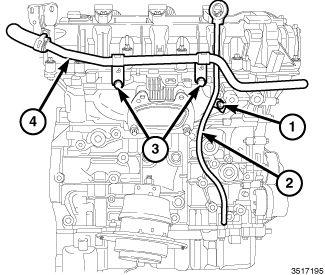
- Remove two bolts (3) from the heater core inlet tube (4) and reposition the tube.
- Remove the bolt (1) and remove the oil level indicator (2).
- Raise and support the vehicle. Refer to HOISTING, STANDARD PROCEDURE .
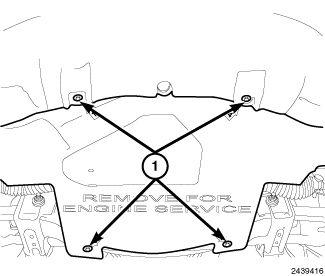
- Remove the belly pan retainers (1) and remove the belly pan.
- Drain the engine oil. Refer to OIL
.
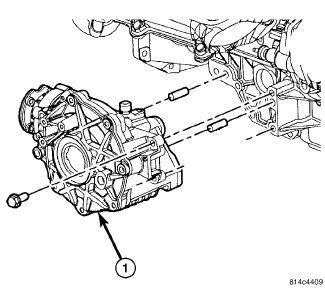
- Remove the front axle assembly (1). Refer to REMOVAL
.
- Remove the front stabilizer bar with isolators and retainers. Refer to STABILIZER BAR, FRONT, REMOVAL
.
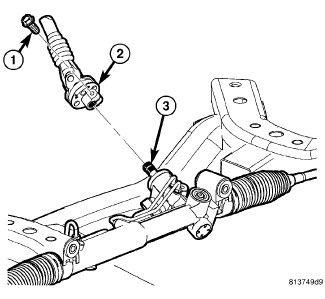
- Remove the lower intermediate shaft coupling pinch bolt (1) from the lower intermediate shaft (2). Separate the lower intermediate shaft (2) from the steering gear shaft (3).
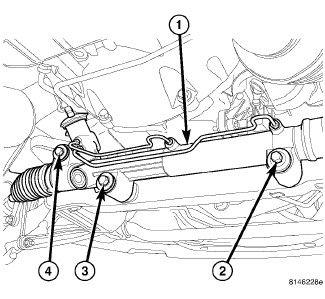
- Remove the steering gear upper mounting bolt (4) and nut.
- Remove the steering gear lower mounting bolts (2 and 3) and reposition the steering gear (1).
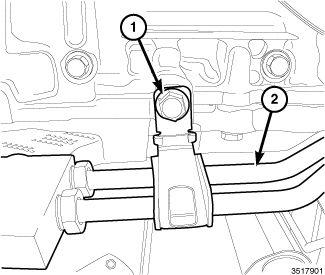
- Remove the bolt (1) and reposition the transmission cooling lines (2).
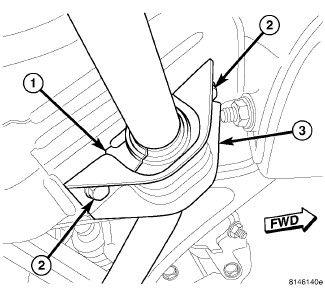
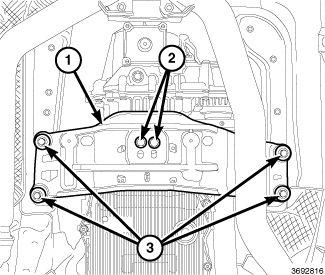
- Remove the two bolts (2) from the rear engine mount isolator.
- Using a suitable jack stand and a block of wood positioned under the transfer case, raise the rear of the engine.
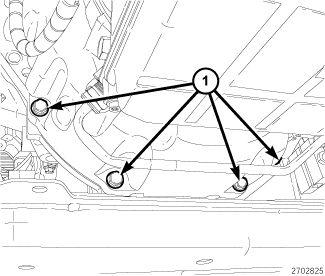
- Remove the four transmission to the engine oil pan bolts (1).
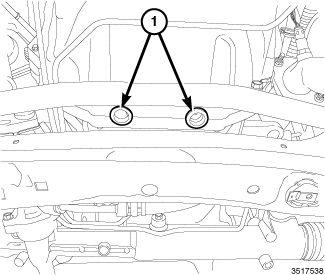
- Remove the two rubber plugs (1) covering the rear oil seal retainer flange bolts.NOTE:
Shown with transmission removed for clarity.
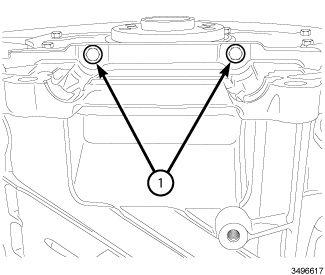
CAUTION:There are two hidden M6 bolts that must be removed from the rear of the upper oil pan flange. If these bolts are not removed, the rear oil seal retainer flange will be severely damaged.
- Remove two M6 bolts (1) from the rear oil seal retainer flange.
- Remove nineteen M8 oil pan mounting bolts (1).
- Using the four indicated pry points, carefully remove the oil pan.
- Remove all residual sealant from the oil pan, timing chain cover, rear seal retainer and engine block mating surfaces. Refer to PAN, OIL, CLEANING .