Cover(S), Engine Timing: Installation
WARNING: This page is about a different variant/trim than selected.
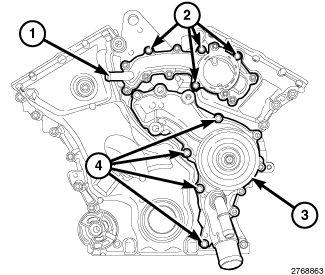
- If removed, install the coolant outlet housing (1) to the timing cover with a new gasket using only the four bolts (2) shown tightened to the proper specification. Refer to TORQUE SPECIFICATIONS .
- If removed, install the water pump (3) to the timing cover using only the four bolts (4) shown tightened to the proper specification. Refer to TORQUE SPECIFICATIONS
.
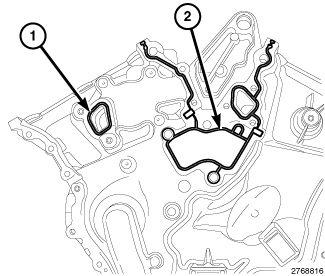
- Install the coolant outlet housing gasket (1) and the water pump gasket (2).
- Clean the engine timing cover, cylinder head and block mating surfaces with isopropyl alcohol in preparation for sealant application. Refer to ENGINE GASKET SURFACE PREPARATION
.CAUTION:
Engine assembly requires the use of a unique sealant that is compatible with engine oil. Using a sealant other than Mopar® Threebond Engine RTV Sealant may result in engine fluid leakage.
CAUTION:Following the application of Mopar® Threebond Engine RTV Sealant to the gasket surfaces, the components must be assembled within 10 minutes and the attaching fasteners must be tightened to specification within 45 minutes. Prolonged exposure to the air prior to assembly may result in engine fluid leakage.
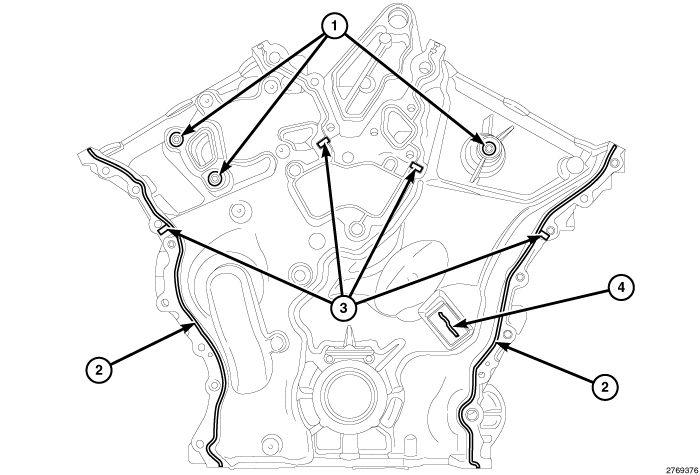
- Apply a 2 to 3 mm wide bead of Mopar® Threebond Engine RTV Sealant to the front cover as shown in the following locations:
- Three cylinder head bosses (1)
- Right and left flanges (2)
- Four cylinder head to engine block T-joints (3)
- Cover to right cam chain tensioner gap (4).
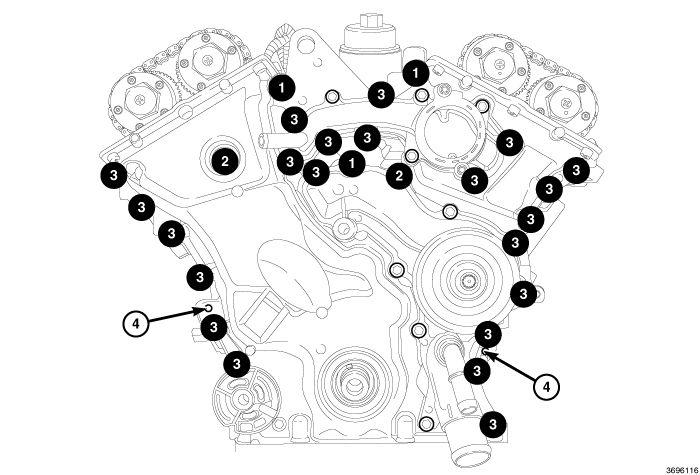
- Align the locator pins (4) on the engine block to the engine timing cover and install the cover.
- Install and tighten the timing cover attaching bolts:
- Twenty-two M6 bolts (3) to the proper Refer to TORQUE SPECIFICATIONS .
- Two M8 bolts (2) to the proper Refer to TORQUE SPECIFICATIONS .
- Three M10 bolts (1) to the proper specification. Refer to TORQUE SPECIFICATIONS .
- Install the upper and lower oil pans. Refer to PAN, OIL, INSTALLATION .
- Install the right and left cylinder head covers. Refer to COVER(S), CYLINDER HEAD, INSTALLATION .
- Install the vibration damper. Refer to DAMPER, INSTALLATION .
- Install the idler pulley. Refer to PULLEY, IDLER, INSTALLATION .
- Install drive belt tensioner. Refer to TENSIONER, BELT, INSTALLATION
.
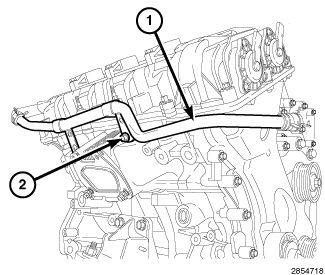
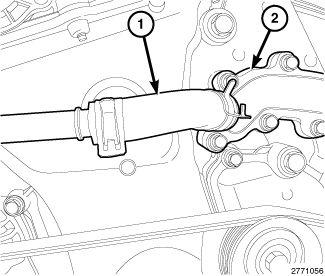
- Install the heater core supply tube (1) with one bolt (2) tightened to the proper specification. Refer to TORQUE SPECIFICATIONS
.
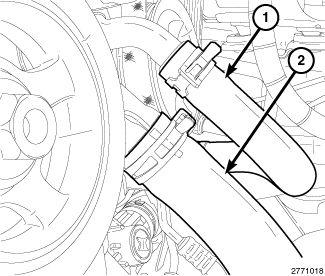
- Install the heater core supply hose (1) to the coolant outlet housing (2).
- Install the lower radiator hose (2) to the water pump housing.
- Install the heater core return hose (1) to the water pump housing.
- Install the thermostat. Refer to THERMOSTAT, REMOVAL .
- If removed, install the oil filter and fill the engine crankcase with the proper oil to the correct level. Refer to OIL .
- Connect the negative battery cable.
- Fill the cooling system. Refer to STANDARD PROCEDURE .
- Run the engine until it reaches normal operating temperature. Check cooling system for correct fluid level. Refer to STANDARD PROCEDURE .