A/C Clutch
The compressor clutch assembly can be serviced with the refrigerant system fully-charged and with the A/C compressor installed on the engine.
Typical A/C compressor and clutch assembly shown in illustrations.
- Disconnect and isolate the negative battery cable. If equipped with an Intelligent Battery Sensor (IBS), disconnect the IBS connector first before disconnecting the negative battery cable.
- On 5.7L and 6.4L engine equipped models, remove the air intake hose and the air cleaner housing. Refer to BODY, AIR CLEANER, REMOVAL .
- Remove the radiator fan and shroud assembly. Refer to FAN, COOLING, REMOVAL .
- Remove the accessory drive belt. Refer to BELT, SERPENTINE, REMOVAL .
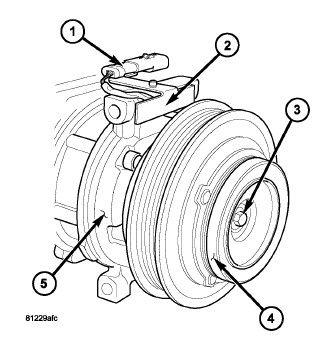
- Disconnect the engine wire harness from the compressor clutch field coil connector (1) located on the top of the A/C compressor (5).NOTE:
Some vehicles (depending on engine application) may require the A/C compressor to be removed from its installed location to gain access to the compressor shaft bolt and/or pulley and field coil snap rings. However, the refrigerant system can still remain fully charged.
- Carefully remove the A/C clutch coil connector and wire lead from the connector bracket (2).
- Remove the compressor shaft bolt (3). A band-type oil filter wrench or a strap wrench may be used to hold the clutch plate (4) from rotating during bolt removal.CAUTION:
Do not pry between the clutch plate and the pulley and bearing assembly to remove the clutch plate from the compressor shaft as this may damage the clutch plate.
NOTE:Use care not to lose any clutch shim(s) during removal of the clutch plate, as they may be reused during the clutch plate installation process.
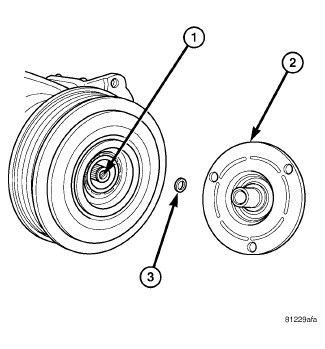
- Tap the clutch plate (2) lightly with a plastic mallet to release it from the splines on the compressor shaft (1) and remove the clutch plate and shim(s) (3).
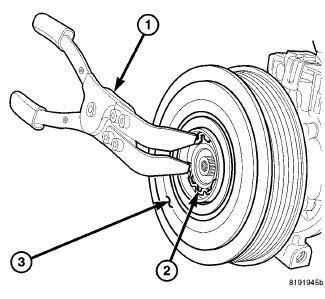
- Using A/C Snap Ring Pliers (special tool #9764, Pliers, A/C Snap Ring) (1) or equivalent, remove the snap ring (2) that secures the pulley and bearing assembly (3) to the front of the A/C compressor and remove the pulley and bearing assembly.
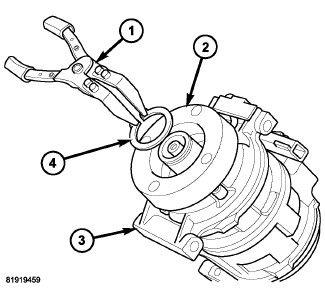
- Using A/C Snap Ring Pliers (special tool #9764, Pliers, A/C Snap Ring) (1) or equivalent, remove the snap ring (4) that secures the A/C clutch coil (2) to the front of the A/C compressor (3) and remove the coil.