Panel, Instrument: Installation
To avoid personal injury or death, on vehicles equipped with air bags, disable the supplemental restraint system before attempting any steering wheel, steering column, airbag, occupant classification system, seat belt tensioner, impact sensor, or instrument panel component diagnosis or service. Disconnect and isolate the battery negative (ground) cable, then wait two minutes for the system capacitor to discharge before performing further diagnosis or service. This is the only sure way to disable the supplemental restraint system. Failure to take the proper precautions could result in accidental airbag deployment.
To avoid personal injury or death, never strike or drop the occupant restraint controller, as it can damage the impact sensor or affect its calibration. The occupant restraint controller contains the impact sensor, which enables the system to deploy the supplemental restraints. If an airbag control module is accidentally dropped during service, the module must be scrapped and replaced with a new unit. Failure to observe this warning could result in accidental, incomplete, or improper supplemental restraint deployment.
- Before proceeding with the following repair procedure, review all warnings and cautions.
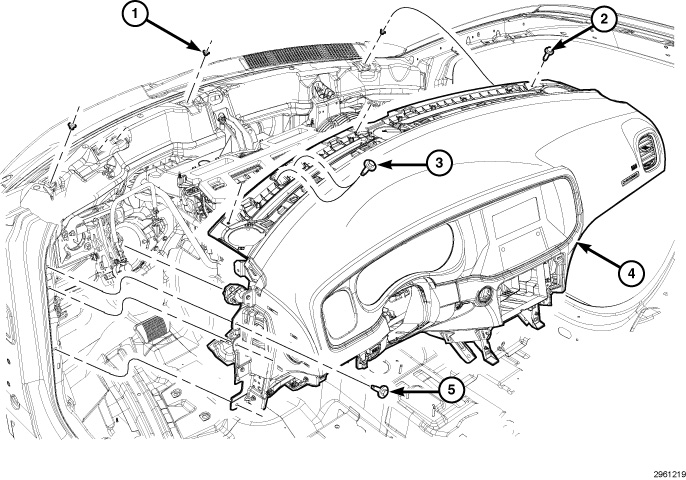
- If required, install new spring nuts (1) into the dash panel.
- With the help of an assistant, carefully position the instrument panel (4) in the vehicle through the drivers door. Hook the instrument panel into the slots on both sides of vehicle. Make sure the instrument panel hooks are properly seated into their openings.
- Loosely install all the instrument panel bolts and screws.
- Tighten the instrument panel top bolts (3) to the proper torque specifications. Refer to TORQUE SPECIFICATIONS .
- Tighten the instrument panel top screws (2) securely.
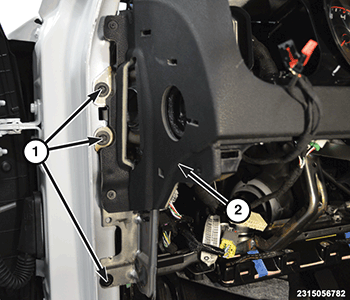
- Tighten the instrument panel side bolts (1) to the proper torque specifications. Refer to TORQUE SPECIFICATIONS .
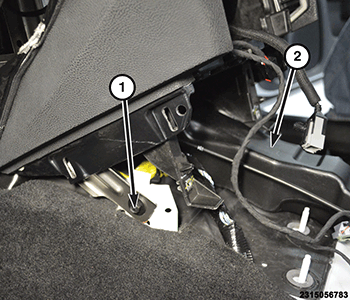
- Tighten the instrument panel center bracket bolts (1) securely.
- Install the floor duct (2) and push fastener.
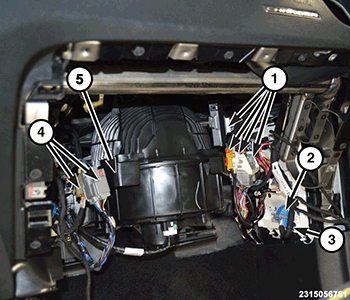
- Under the right side of the instrument panel connect the wire harness connectors (2) and clip the harness (3) in place.
- Connect the wire harness connectors (1).
- Connect the wire harness connectors (4) and clip them to the HVAC housing (5).
- Under the left side of the instrument panel connect the wire harness connectors (1).
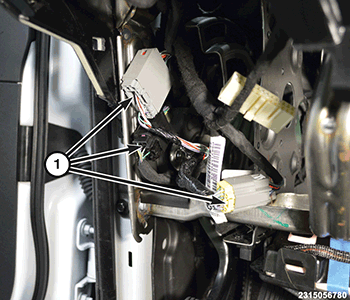
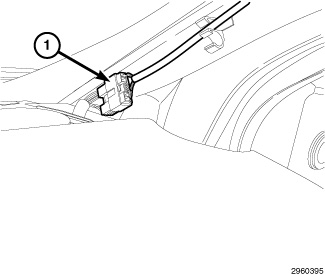
- Connect the wire harness connectors (1) at the A-pillar, on both sides of vehicle.
- Install the defroster grille. Refer to GRILLE, DEFROSTER, INSTALLATION .
- Install the glove box. Refer to GLOVE BOX, INSTRUMENT PANEL, INSTALLATION .
- Install the steering column. Refer to COLUMN, INSTALLATION .
- Install the floor console. Refer to CONSOLE, FLOOR, INSTALLATION .