Pan, Oil, AWD: Installation
- Clean the oil pan gasket mating surface of the block and oil pan.NOTE:
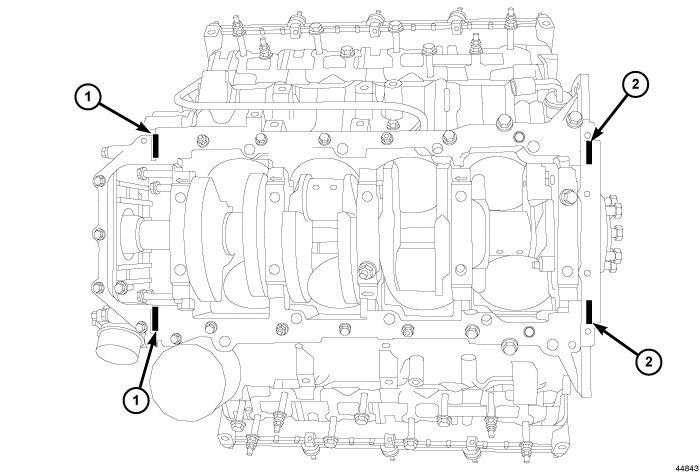
Mopar® Engine RTV must be applied to the 4 T-joints, (area where front cover, rear retainer, block, and oil pan gasket meet). The bead of RTV should cover the bottom of the gasket. This area is approximately 4.5 mm x 25 mm in each of the 4 T-joint locations.
- Apply Mopar® Engine RTV at the 4 T- joints (1, 2).
NOTE:
When the oil pan is removed, a new oil pan gasket/windage tray assembly must be installed. The old gasket cannot be reused.
- Install a NEW oil pan gasket/windage tray assembly.
- If removed, install the oil pump pickup tube with a NEW
O-ring and tighten retainers to the proper specification. Refer to TORQUE SPECIFICATIONS
.NOTE:
The horizontal M10 fasteners are 5 mm longer in length, and must be reinstalled in original locations.
NOTE:NEW M6 fasteners must be used when reinstalling the oil pan. Do not reuse the old M6 fasteners.
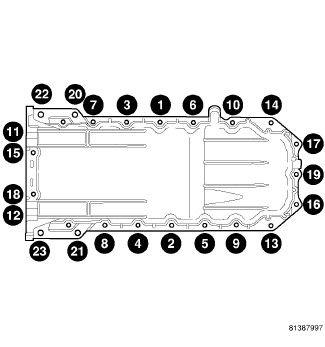
- Align the rear of the oil pan with the rear face of the engine block, and install the M10 and M6 oil pan retainers finger tight. Using the sequence shown, tighten the M6 mounting bolts to 5 N.m (44 in. lbs.).
- Using the sequence shown, tighten the M10 oil pan retainers to 54 N.m (40 ft. lbs.).
- Using the sequence shown, tighten the M6 oil pan retainers to 12 N.m (9 ft. lbs.).
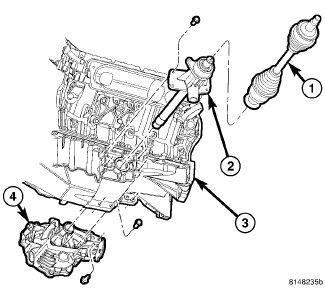
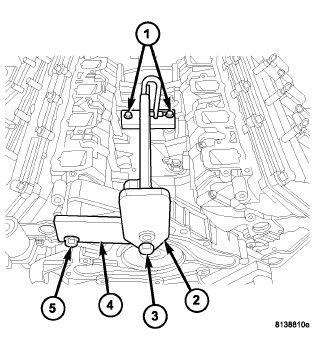
- Install the intermediate shaft (2) to the oil pan (3) and tighten retainers to the proper specification. Refer to TECHNICAL SPECIFICATIONS
.
- Install the front differential through the opening at the rear of the cradle and attach to the oil pan.
- Fasten the differential (4) to the oil pan (3) and tighten to the proper specification. Refer to TECHNICAL SPECIFICATIONS
.
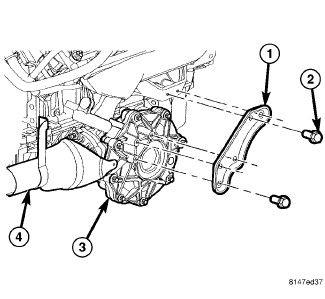
- Install the differential support bracket (1) to the differential and engine block.
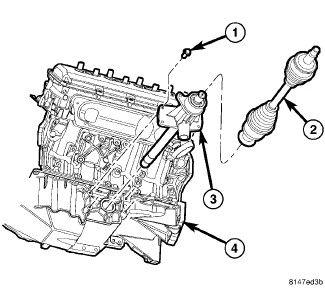
- Install the left (2) and right front drive axles. Refer to INSTALLATION .
- Install the front drive shaft into the differential and transfer case. Refer to INSTALLATION .
- Install the engine oil dipstick and tube.
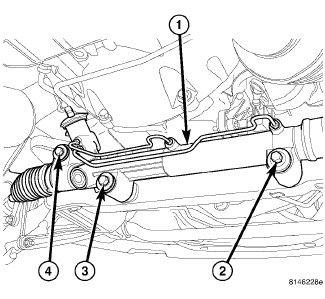
- Install the steering gear (1). Refer to GEAR, INSTALLATION .
- Lower the engine into the mounts using engine lift fixture (special tool #8534C, Fixture, Driveline Support).
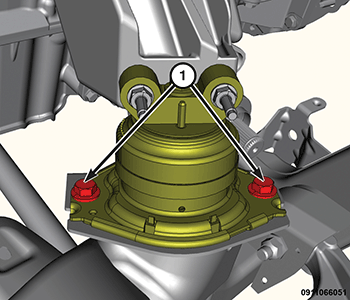
- Install both the left and right side engine mount isolator to engine cradle retaining bolts (1) and tighten to the proper specification. Refer to TORQUE SPECIFICATIONS
.
- Remove the engine lift fixture (special tool #8534C, Fixture, Driveline Support) and adapter (special tool #8984-UPD, Adapter, Engine Lift).
- Install the Variable Valve Timing Solenoid (VVTS). Refer to SOLENOID, VARIABLE VALVE TIMING (VVTS), EXHAUST, INSTALLATION .
- Install the left and right side exhaust pipes at the manifolds. Refer to CONVERTER, CATALYTIC, INSTALLATION, 5.7L .
- Install the engine oil filter and fill the engine with oil. Refer to OIL .
- Connect the negative battery cable.
- Start the engine and check for leaks.